Getting Started
Do you have Sonnet Suites installed? Are you wondering how to begin using the software? This is the page for you! We cover the many learning resources and aids available in every installation of Sonnet. Please use this material to get familiar with the software and know that our Technical Support Team is only a phone call or email away.
Sonnet is a flexible EM modeling tool that can adapt to your particular design flow. For standalone users, it offers a Project Editor front end that will allow you to create your circuit using typical 2D CAD commands to draw trace patterns. Industry standard CAD files such as DXF, GDS, and Gerber can also be imported, to efficiently handle complex circuits. We also offer interfaces for users who wish to access Sonnet through existing design tools (Agilent ADS, AWR Microwave Office, Cadence Virtuoso). This allows you to stay in your design environment of choice and spend minimal time in the Sonnet interfaces. Which approach is best for you depends on your specific needs and goals. We do recommend that you gain some basic familiarity with Sonnet as a standalone EM tool before you start using it in a more automated fashion integrated in your design flow. However you chose to utilize Sonnet, we provide extensive resources to make it a success.
Step #1 - The Sonnet Taskbar
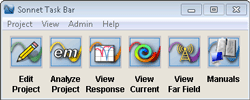
Sonnet Task Bar is the starting point in opening any of the Sonnet Suites
When you open Sonnet, the first window that appears is the Taskbar. It is a small window that includes buttons to open the various software modules.
The Edit Project button is the one most commonly used as this is how you open the Project Editor and setup a model.
The Analyze Project button will open the Analysis Monitor so you can start a simulation of an existing project file.
The View Response, View Current, and View Farfield buttons are useful if you already have a project with data and wish to view the results. Each of these secondary software modules can be opened from within the Project Editor, so it is not necessary to return to the Taskbar.
For now we will focus on the available learning resources available from the Taskbar. Later we will mention some of the other tools available within the software interfaces and our website.
Manuals
Notice the large Manuals button on the Taskbar. Clicking this button will open a two page PDF document with links to the full Sonnet manual set. We include the full manual set with all of our products. Everything from licensing and installation, to software usage is covered. While each of the manuals serves a purpose, the most important ones from a learning standpoint are described below.
- Getting Started manual – The first item listed in the .pdf document is the Getting Started manual. This is the best place to start for any new user as it will introduce you to the Sonnet interfaces, through basic technical discussion and hands on tutorials. It walks you through the procedure of creating a model from scratch, strictly within Sonnet (standalone). You should be able to work through this material in 2 – 3 hours time and have an understanding of the Sonnet fundamentals.
- User’s Guide – For more in-depth discussion on specific topics (Ports, De-embedding, etc), you should refer to the User’s Guide. More advanced tutorials on topics such as parameterization, are included as well.
- Examples – Sometimes seeing another complete model can give you insight that you might not learn elsewhere. To fill this need, we include examples with every Sonnet installation.
- Translators: Perhaps you do not wish to draw your structure from scratch and would like to save time using an existing DXF, GDSII, or Gerber file from an earlier step in your design flow. Sonnet translators are available for each of these formats and their usage is covered in the Translators manual.
Also covered in this manual is the usage of the AWR MWOffice, Agilent ADS, and Cadence Virtuoso interfaces. These auxiliary software modules allow you to tightly integrate Sonnet in your design environment. Layouts from these tools can seamlessly be translated to Sonnet for simulation and the results transferred back for overall circuit simulation.
**TIP: If you have the appropriate version of Adobe Acrobat, you can highlight, bookmark and add your own notes, as you would with other .pdf documents. This is a useful way to mark passages for future reference.
Help
As you would expect, Sonnet provides an excellent Help resource. To access it, go back to the Taskbar and select the Help menu. The first two entries “Contents” and “Search for Help on…” bring up the Help file included in your Sonnet installation. You can Browse by topic, look up a keyword in the Index or Search the Help file.
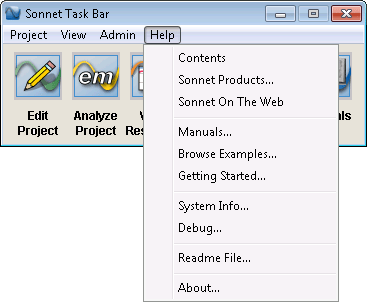
Sonnet Task Bar Help
**Tip: Notice that also in the Help menu are the very same manuals mentioned above. Since the Help menu appears in every Sonnet software module, it provides easy access to the manuals wherever you are.
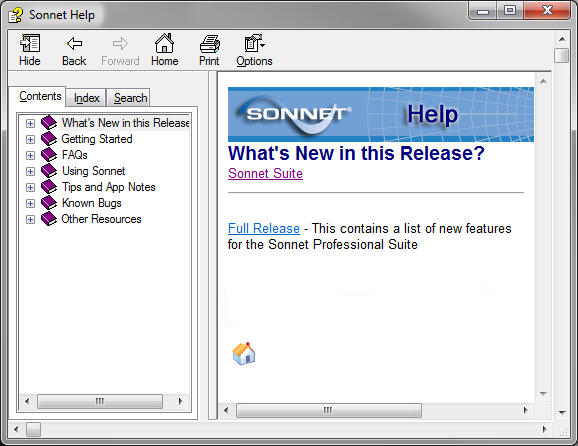
Integrated Help
Resources Inside the Sonnet Project Editor
Quick Start Guide
As noted previously, all of the Manuals, Examples and Help resources are available from the Help menu in every software module. One additional aid in the Project Editor is the Quick Start Guide. The Quick Start Guide provides an interactive checklist that will assist you with model construction and setup.
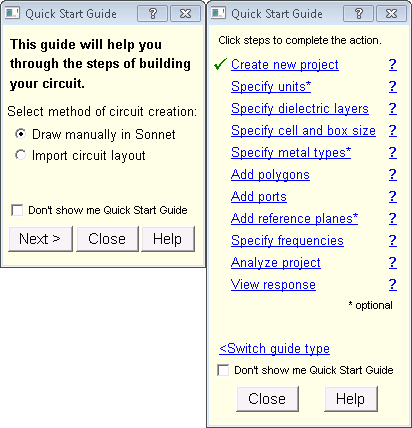
Sonnet's Quick Start Guide maps your progress through design setup and helps you find answers quickly for the next step
Context Sensitive Help
As you are working with the software, you will notice that in every window there is a Help button. This button will open up the help topic most closely related to the settings or properties in the window. For those users who like to learn on the fly, context sensitive help is a trusty copilot!
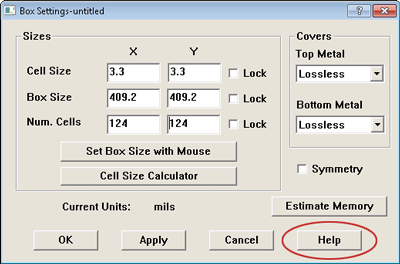
Sonnet makes context sensitive help available to you from dialog boxes. The Help buttons take you directly to relevant reference material.
Resources from the Sonnet Web Site
The key resources available for new users on our website are the Knowledge Base and the Sonnet videos page. The Knowledge Base is actually a more up to date version of the Help file delivered with your software and discussed above. The Sonnet videos page offers tutorials and demonstrations to show you how to use different features in the software. For specific questions and of course with proprietary models/circuits, we highly recommend that you contact Sonnet Support directly.
A Final Tip
Most new users do not realize that the Sonnet project actually consists of several files and subfolders. The basic project geometry information is included in the project file (.son file extension). If there is data, it is included in a “sondata” folder, which appears as a subfolder to the folder where the project is saved. Generally speaking, you do not need to be concerned with the files in the “sondata” folder as these are opened and read from within the Response Viewer, Current Density Viewer, and Farfield Viewer directly. Given this information, you might be wondering how you can share entire projects with colleagues or with Sonnet Support. The Sonnet packed project archive is perfect for this application. A packed project archive is a zipped archive and it includes all of the files associated with a given project file. The file extension is .zon and it can easily be created using the menu command File => Export => Packed Project. Opening a packed project archive uses a similar menu command File => Import => Packed Project.
**Tip: You can also work with Packed project files using the menu Command Project => Manage, from the Taskbar. Notice there are also convenient commands to Copy, Move, Rename, Delete, Clean or Unlock a project file. This is the proper way to handle file management of Sonnet projects.


