If you wish to set a specific box size in order to make the Sonnet Box bigger than the bounding box without having to use the margin settings, you can use a Sonnet Custom Box.
Creating a Custom Box
To create a custom box, do the following:
- Open the design layout and select Sonnet ⇒ Setup ⇒ Analysis Box ⇒ Create Custom sonnet_box in the main menu.
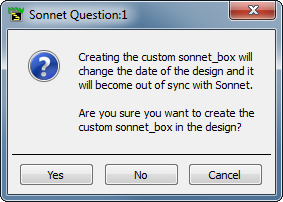
A question about using a custom box appears on your display.

- Click “Yes” to close the question box.
The cross-hair cursor appears in your layout window.
- Click in the layout on one corner of the desired custom box.
- Drag the cursor to the desired box size.
A rubber-band will follow your cursor showing you the box size.
- When you have the desired box size, click in the window again.
The outline of the custom box appears in your layout. A green outline indicates a custom box.
Turning a Custom Box on and off
If you have added a Sonnet custom box to your circuit, but do not wish to use it for a simulation, you can switch back to your default box size by clicking on the Delete Custom Box button at the bottom of the Analysis Box dialog box. If you want to use the Custom Box again, click on the Set Custom Box button. The previously entered custom box will appear in your layout in green.
Changing a Custom Box
To change the size of a custom box after it has been defined, you delete the existing custom box, then add a new one.
- Select Sonnet ⇒ Setup ⇒ Analysis Box ⇒ Delete Custom Sonnet Box from the layout menu.
A question about using a custom box appears on your display.
- Click “Yes” to close the question box.
The custom box no longer appears in your layout.
- Open the design layout and select Sonnet ⇒ Setup ⇒ Analysis Box ⇒ Create Custom Sonnet Box from the layout menu and follow the directions for adding a Sonnet Custom box.
