Selecting Insert ⇒ Dimension from the project editor main menu allows you to select 2 points in your circuit and have the length between them in the x or y plane displayed on your circuit. This can be used as both a quick way to measure dimensions of your circuit or to have dimensions shown in order to make the drawing clearer. Note that the dimensions can only lie in the x or y plane. No diagonal dimensions are allowed.
You add a dimension in the following manner:
- Select Insert - Dimension from the menu.
The cursor changes to indicate that you are adding a dimension.
- Click on the first point of the dimension you wish to measure.
The point must be part of a polygon in your circuit. The point you click on is highlighted by an open square.
- Click on the end point of the dimensions you wish to measure.
When you click on the end point, it is highlighted with an open square. The measurement appears on your display and moves with the mouse.
- Click your mouse when the dimension is at the desired position.
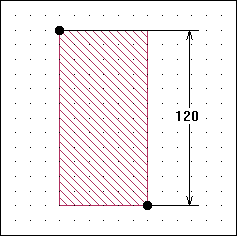
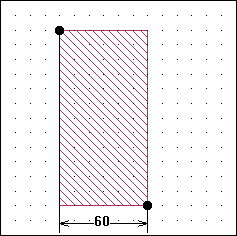
If there is difference in both the x and y planes between the two end points, then the dimension can be moved so that the dimension is in either the x or y plane. See the illustrations below.


The dots on the pictures indicate the two points used in defining the dimension. Note that their position is the same in both pictures. The 120 mils is the dimension in the y plane; the 60 mils is the dimension in the x plane.
Tool Bar Button: 

